

How To Join Binding Strips On A Quilt

(Editor's note – to view a video of this tutorial, please scroll to the bottom of this postal service)
Lots of quilters blench when it's time to ally the beginning and ending binding strips together with a seam. It'southward common to employ the avoidance maneuver instead, choosing to fold over a small seam assart on one strip and the slipping the raw end of the other strip inside before sewing them both to the quilt top (see images below).
While this is a speedy solution, it makes a noticeable ridge or lump at that point which volition wear more quickly than other areas of the binding. And unless the fold is sewn shut, it's a place that can become caught and torn open.
It's actually very easy to bring together those two binding strips with a mitered seam that volition eliminate the bulk and make your starting and catastrophe indicate invisible.
For the purpose of this tutorial I'm going to assume yous empathize how to prepare binding strips for your project and adhere the binding to your quilt edges. However, you lot will demand to know the width of your binding strips earlier you lot folded them to brand your binding. Y'all tin can cull what that width is based on your preferences—information technology doesn't thing for this technique. But you'll need that number when it'due south time to run up the beginning and final ends together.
Also programme on making your binding about 16-twenty inches longer than what y'all demand for your quilt's perimeter to give you enough of wiggle room as you lot learn this technique. In one case you go the hang of it you tin get by with less. Prepare your quilt the way you usually practice for binding. (Some quilters become ahead and trim away the excess backing and batting before attaching binding, while others wait to practise that after information technology is sewn on. The choice is yours.)
Follow these easy steps to achieve a "perfect end" to your binding attachment process. In this case, I accept cut my original bounden strips ii-i/ii" wide before joining them and pressing them in half. Therefore the instructions will use that measurement to teach you lot the method. But during Step Four you will use the measurement that matches the width of YOUR binding strips before folding and pressing them:
Step One:
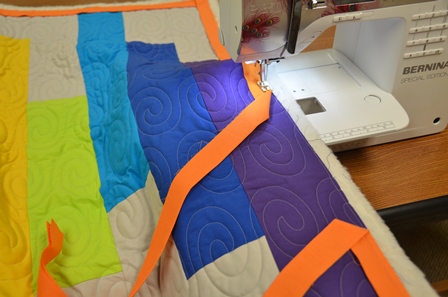
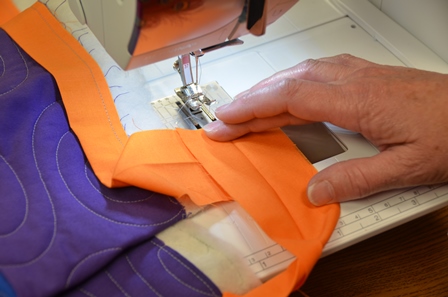
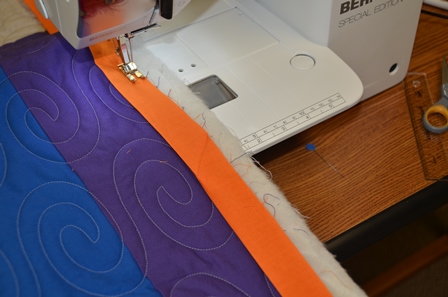
When first attaching your binding, leave well-nigh an 8-inch tail of binding unattached earlier starting to run up it to your quilt. Align your binding'south raw border with the edge of your quilt. Secure the starting signal with a few back stitches. Sew the bounden to the quilt top ¼-inch in from the raw edge of the binding.
Step Ii:
Proceed sewing the binding around the quilt until you are well-nigh 12 inches away from your starting point every bit in the photograph beneath. Secure the stitching with some back stitches.
Pace Three:
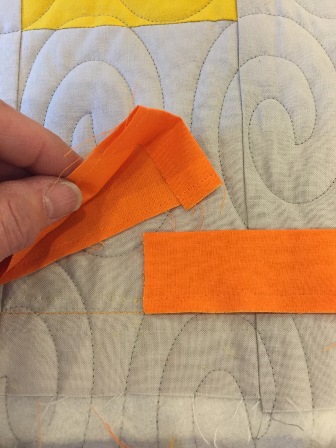
Align your starting strip along the quilt's edge every bit if it were already sewn in place. Secure with a pin or two if necessary to keep it from shifting. If you've left the starting strip super-long, you may need to trim some of the excess off so that you have plenty room to manipulate the two strips and join them. Leave at to the lowest degree vii-eight inches of the starting tail still intact.
Step Four:
Place a pin next to the end of the starting strip as shown in the photo below. Overlap the catastrophe strip on top of your starting strip. Pin in identify if necessary to avoid shifting.
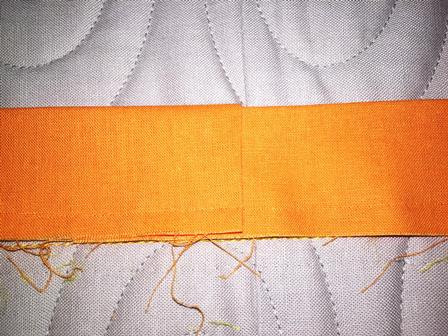
From the mark pin you lot added, measure down the overlapped strips 2-ane/2 inches (this amount should be equal to the width y'all originally cut your binding strips—ii-1/2 inches in my example. Mark this location on the height strip equally illustrated in the photograph below.
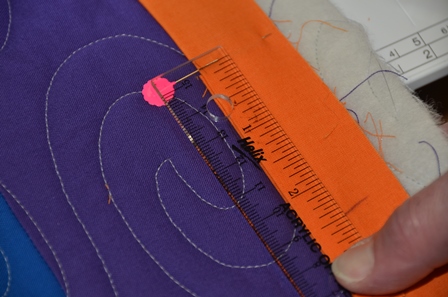
Now cut the top ending strip off right at this mark.

Step 5:
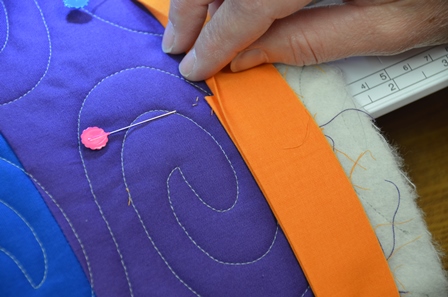
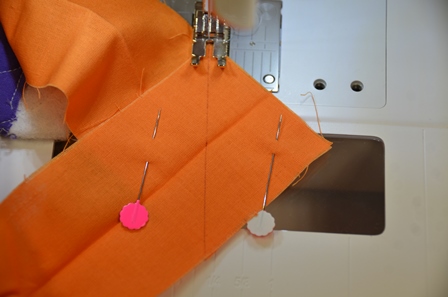
Remove whatever pins you've used to temporarily agree the bounden strips in place. Open upwardly the binding pieces and rotate the ends and then that the right sides are together and aligned every bit shown in the photograph below.
Adapt the quilt tiptop as necessary to make the overlap easy to manage. Pivot the two sections together and mark a seam line equally shown in the photo below. Sew beyond the two binding pieces on your marked line.
Pace 6:
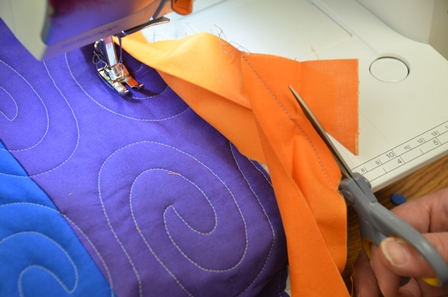
Gently fold the bounden dorsum together and bank check for fit along the quilt edge earlier trimming and pressing the seam. Adjust if needed. When you lot are satisfied with the fit, trim the seam assart to ¼-inch, and press the seam open.
Refold the binding strip wrong sides together and finish attaching it to your quilt, pinning if necessary.
That's it! Easy, cute binding with no noticeable beginning and terminate!
Lookout the video for this tutorial:
Source: https://www.apqs.com/how-to-join-your-binding-ends-for-a-beautiful-finish-with-video/
0 Response to "How To Join Binding Strips On A Quilt"
Post a Comment